
Brewing Beer Instructions
Click here for my Brew log here --> Brew Log
Material Setup:
- Boiling Pot - 3 to 5 gallon; stainless steel or "enamel-on-steel" only
- Stirring Spoon - Long handled
- Kitchen Strainer - wire metal mesh
- Mountain Spring water - 1 gallon frozen
- Hops, Yeast, Malt, Corn Sugar etc. (see recipes)
Time to brew:
-
Carboy Cleaning
1/4 Cup of Rice with a couple tablespoons of backing powder
-
Sanitizing (Please consult expert ... I found this in
the internet)
2 TBLS Clorox to 1 gal of water for 20 minutes
-
 Rehydrate
the dried yeast
Rehydrate
the dried yeast
Although many people skip this step with fair results, re-hydrating it assures the best results. While you are waiting for the brew water to boil, rehydrate two packets of dried ale yeast. Put 1 cup of warm (95-105°F, 35-40°C), pre-boiled water into your sanitized jar and stir in the yeast. Cover with plastic wrap and wait 15 minutes.Next, "proof" the yeast. Start by adding one teaspoon of malt extract or table sugar to a small amount of water (1/4 cup, for example) and boil it to sanitize. (A microwave oven is good for this step.) Allow the sugar solution to cool and then add it to the yeast jar. Cover and place in a warm area out of direct sunlight. Check after 30 minutes, it should be exhibiting some signs of activity - some foaming and/or churning. If it just seems to sit on the bottom of the jar, then it is probably dead. Repeat the rehydration procedure with more yeast.
-
Add Grains:
.JPG)
If you are using grain, put the crushed flavoring grains in a cheesecloth sock and put the sock in your brew pot with 2 to 3 gallons of cold tap water. Submerge the grain under the water and turn on the heat.
-
.JPG) Bring to 180° F
Bring to 180° F
Stirring occasionally raise the heat to 180 degrees F., then fish out the sock (Beware, it will be hot!) and give it a good squeeze - just like you would a tea bag. Throw out the grain bag and bring the flavored water to a full boil.
-
Add Malt Extract
Now is the time to add your malt extract. If you are using a tub of bulk extract: beware that the handles of the tub come off very easily! Do not hold your tub upside down by the handles.
-
.JPG)
.JPG) Stir while Adding Malt
Stir while Adding Malt
beware of the very thick malt going straight to the bottom of your boiling water pot and scorching on the hot metal below. STIR THE MALT WELL AS YOU POR IT INT TO PREVENT IT FROM BURNING. If you don't feel that you can comfortably do this, take the pot off of the heat, put in the malt, stir well, then put the pot back on the hot burner.
-
BEWARE of BOIL OVER
Beware (BEWARE, BEWARE) that ten minutes or so after you add the malt, the "wort" will again start to boil. As this dense malt solution comes up to a boil it will form a thick layer of lemon meringue/cappuccino foam on the surface which will VERY QUICKLY rise up off the surface of the liquid and foam right on out of your pot onto your stove and make a huge mess. Right as this starts to happen, lift the pot off of the heat with two potholders. The foam will settle down. Put the pot back on the hot burner and it will quickly foam up again. Take it quickly off, and repeat this five or six times. (Do not worry if it never happens - that's very OK, too.) Kid of lower the heat k stir the foam, and trust me, the foaming will go away on its own. Bring your wort into a rolling boil.
-
.JPG) Add Hops
Add Hops
Amount of Hops Type of Hops Boiled For 1 oz Brand? entire 60 minute boil 1 oz Brand? last 12 min of boil
-
.JPG) Remove Heat
Remove Heat
At the end of the sixty minute boil, turn off the heat, put the lid on the pot.
- Cool the Word (Option #1)
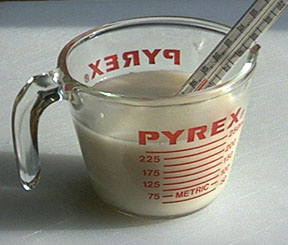
Insert a clean copper chiller in the boil for about the last 10 minutes to allow it to be sterelized in the boiling wort. As soon as you turn off the heat, turn on the water to cycle through the chiller. I wanted 70 degrees to add the yeast so I cooled the wort to 120 degrees and then added 2 gallons of my well water to fill the 5 gallon bucket. This surprisingly did bring the temp from 120 to 70.... I may want 130 next time to try and get the temp more around 78 to 80.
- Cool the
Wort (Option #2)
Pour your cooled wort through a STERILIZED strainer into a STERILIZED fermenting bucket. Add the block of frozen ice. Rinse the caught hops with a little water, then top off the fermenter to five gallons. Use the strainer to remove the hops. Measure the temp after the ice melts. Then immerse the wort in the sink full of ice cubes. Let cool to 65-90 degrees F as soon as possible.
-
Cool the
Wort (Option #3)
Pour your cooled wort through a STERILIZED strainer into a STERILIZED fermenting bucket that is immersed in ice. Add the block of frozen ice. Rinse the caught hops with a little water, then top off the fermenter to five gallons. Use the strainer to remove the hops. Let cool to 65-90 degrees F as soon as possible.
-
Cool the Wort (Option #4)
Put the gallon of ice into the pot and leave the lid on. Then immerse the pot into a bath of ice. Cool until the temp reaches 65-90 degrees F as soon as possible. Pour your cooled wort "aggressively" so that it splashes and churns in the bucket... through a STERILIZED strainer into a STERILIZED fermenting bucket and add water. This action adds the oxygen yeast need for growth. This is the only time during the brewing process that you want the beer to be aerated or exposed to oxygen. All other transfers should be done "quietly," with a sanitized siphon and very little disturbance in the flow and minimal contact with the air.
- Cool the Word (Option #5)
Use a copper coil to run cold water through the coil to cool the wort. Wash the copper coil and then insert into the wort while it is boiling. Boil with the copper inserted for at least two minutes to sterelize it. Let wort drop to about 100 degrees F. Additional cold water to the 1st Fermentation bucket will drop the temperature to the 70 - 80 degree range for pitching yeast. Check your yeast temp requirements first.
-
Add Yeast
When the temperature in your fermenter reaches 80 degrees or less, add the rehydrated yeast solution to the fermenting bucket.
-
Primary Bucket Fermentation: Add Air Lock & allow to ferment
Add air lock.
Allow to ferment for 2 to 6 days (others say 5 to 10 days).
Skip secondary fermentation stage if recipe was allowed to stay in primary fermentation container for more than 3 weeks.
- Secondary Carboy Fermentation: 1st Time Rack
Transfer the content to the secondary fermentation container (glass carboy).
Allow to ferment in secondary fermentation container for 2 weeks .
-
.JPG) Carbonate and Bottle
Carbonate and Bottle
Add one cup of corn sugar with one pint of water and bring to a boil. Transfer the corn sugar and water to a clean plastic carboy. Siphon the beer from the carboy into the bucket with sugar water. Next siphon the beer from the bucket to the bottles.
Note: Repitch same yeast (before bottling) if more than 6 weeks has elapsed since you started.
-
Wait to drink
Wait 2 to 3 weeks before drinking to allow for carbonation.